Table of Contents
Create and edit attributes
 Updated
by Julia Walther
Updated
by Julia Walther
The following section introduces attributes and explains how you can sort by attributes.
General information
Each piece of information that you assign to your guests is created in Sweap as a separate attribute. So attributes are information of your guests/event.
Sweap distinguishes between master attributes such as contact data and freely definable information, for example table number or seat.
Creating attributes
There are three different ways to create an attribute:
- by importing guest information from an Excel spreadsheet. Sweap automatically recognizes individual, not yet existing information from Excel and transfers it to the CMS on request. You can find further explanations on importing guest information here.
- manually on the CMS page of the corresponding event under guests>Attribute and by clicking on the button 'Create Attribute'.
- during website configuration when linking form elements in the configuration step registration form. Please remember that form elements of the registration form of the website are usually always linked with an attribute. This means that when you create a new form element, the system not only displays all existing attributes, but also allows you to create new attributes during this step. For more information about this module of the Web page configuration, see here.
Creating an attribute manually
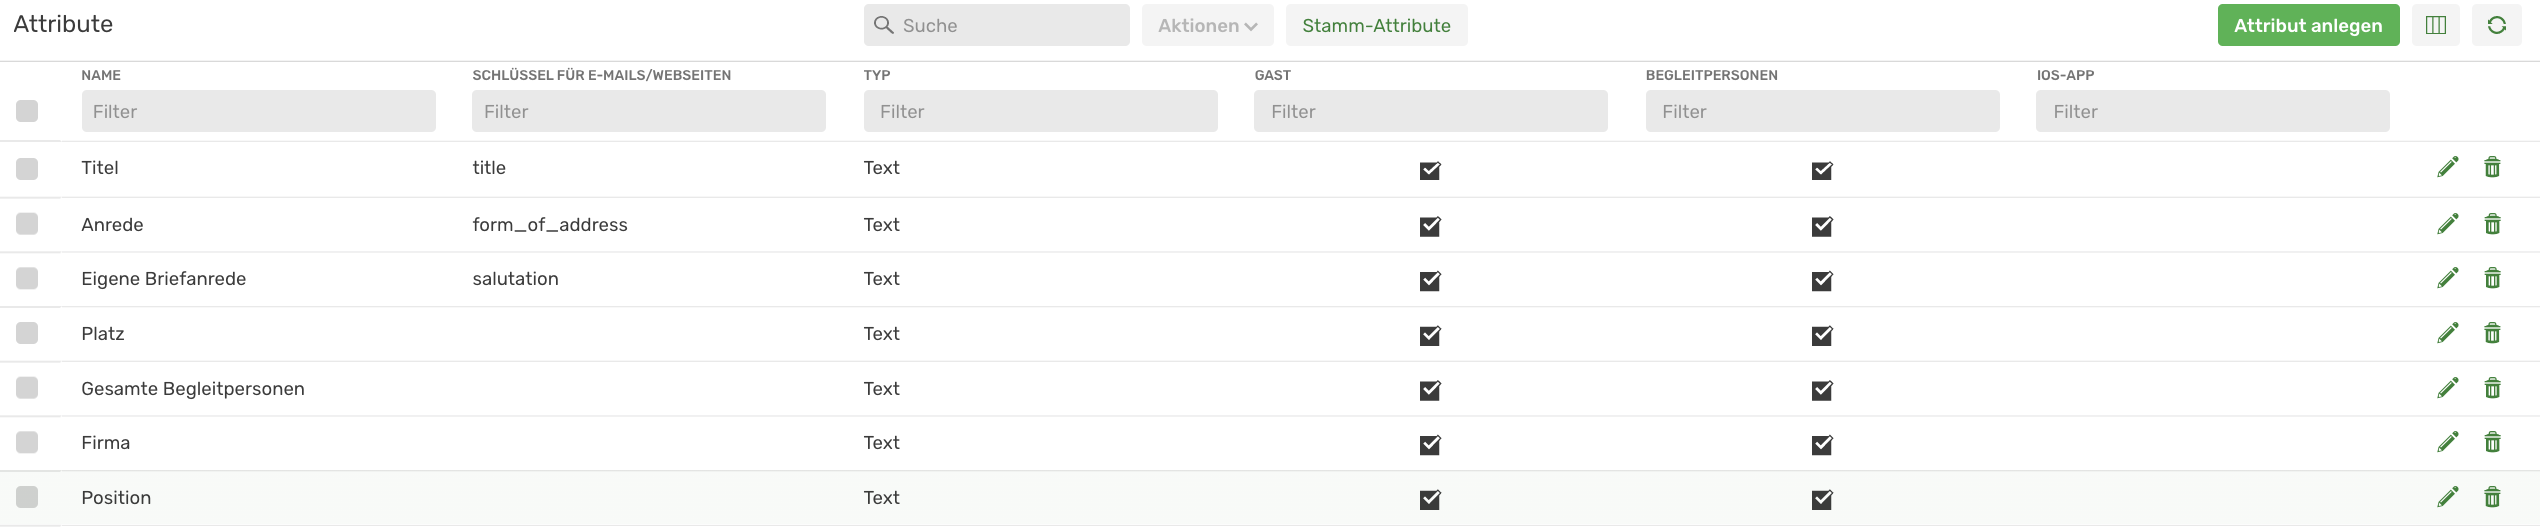
To create a new attribute manually for an event, open the corresponding CMS start page of the event and go to Guests > Attributes and click on "Create attribute".
Now you can define all relevant information of the new attribute:
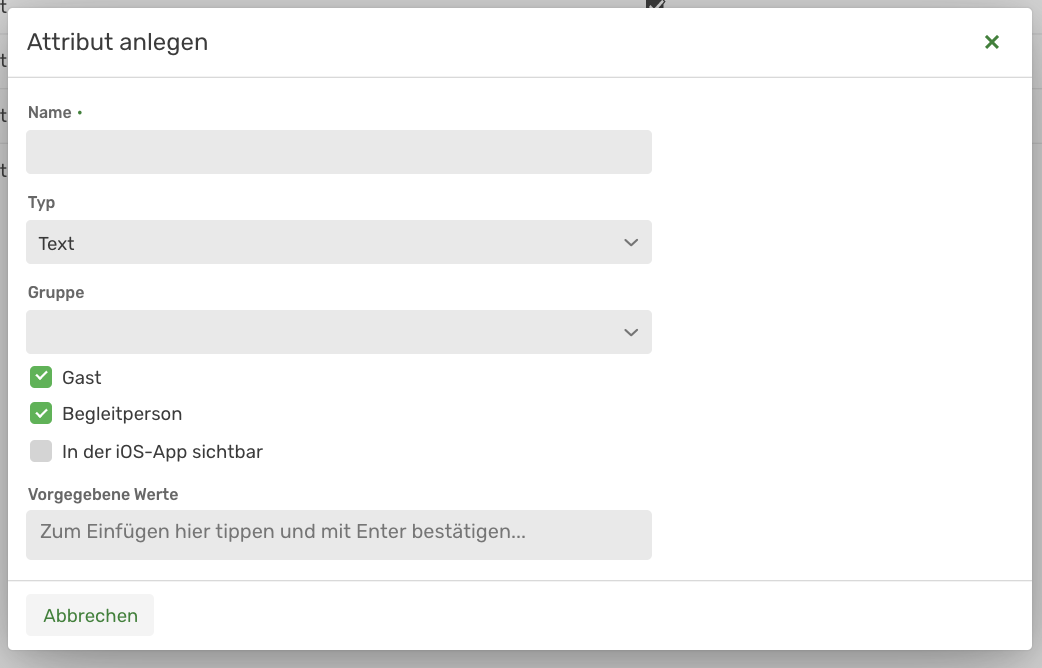
First enter the name of the attribute (this is a mandatory field), define the attribute type and decide whether the attribute should be visible in the iOS app later on.
You can choose from the following attribute types.
- Text
- Number
- Yes/No Value
- Date
- Time
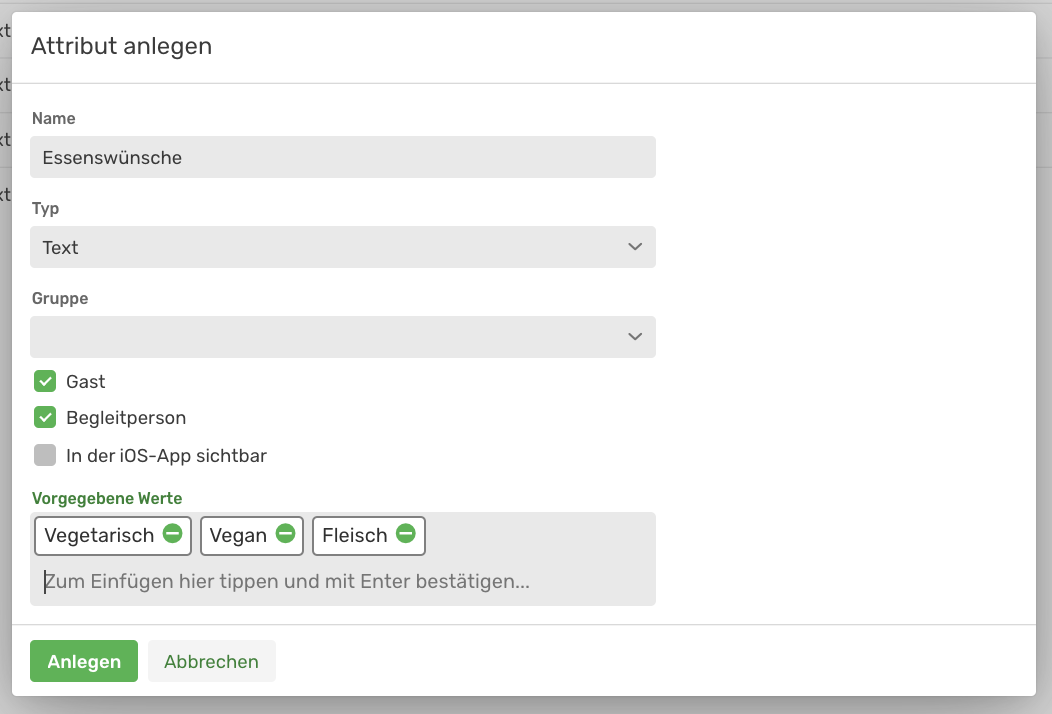
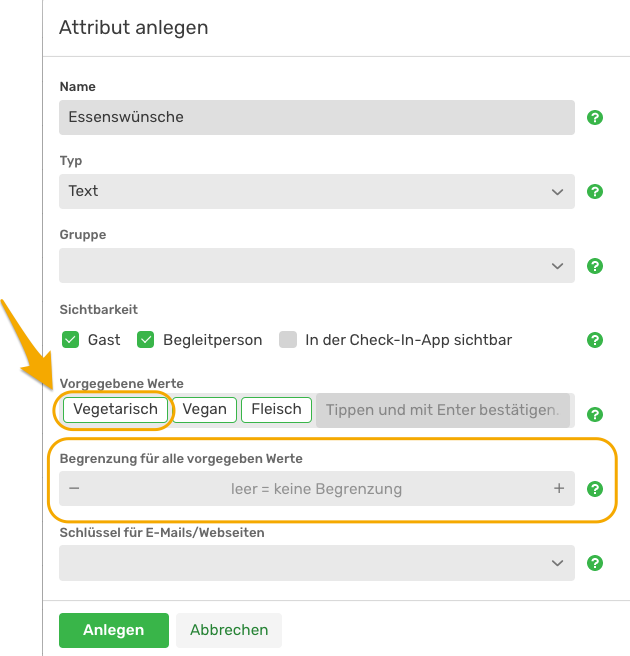
Next, you can specify default values that are then linked to the attribute. You would like to create the attribute "food preferences" so that your guests can send you culinary preferences directly when they register for the event later. These individual values, which are assigned to your attribute, can later be selected directly by the guest during registration (for example, in a drop-down menu or a radio button within the registration form on the website).
Let's stick with the new attribute "food preferences". We want to provide three choices and therefore create the values "Meat", "Vegetarian" and "Vegan". You can simply type in values and finish the input of a value with the Enter key and start with a new one.
Assigning several values to an attribute simultaneously
There is a very useful command that allows you to add multiple entries to given values at once, instead of having to manually enter each attribute one after the other and add them with Enter.
To do this, simply create a list of values to be assigned to the attribute and separate the individual entries of the list with this symbol ||.
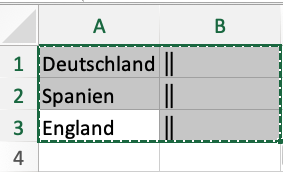
Example: Let's say you want to create a new attribute "Land" and set the following countries as default values: Deutschland, Spanien and England.
To do this, simply add the list with the symbol just described as follows: Deutschland ||Spanien ||England and press Enter.
The system automatically copies the individual values and separates them using the symbol ||:
If you now click on 'Create', the new attribute is created and appears in the attribute overview of your event.
Create attributes across accounts
Attributes can be entered once and are automatically applied to all future events across all accounts.
To do this, please contact your administrator.
You can find further information here.
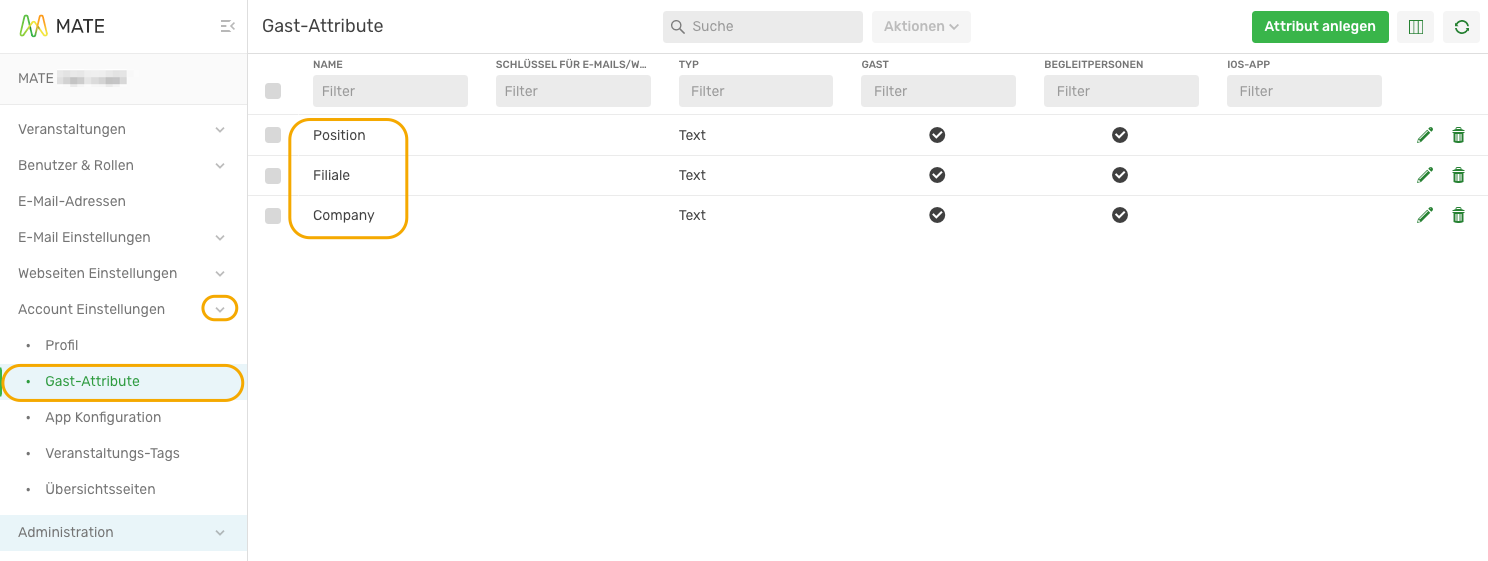
To do this, please go to Account Settings ---> Guest Attributes in the menu area on the left.
The creation follows the same principle as for guest attributes for a specific event (see section "Creating an attribute manually")
Automatic registration for new events
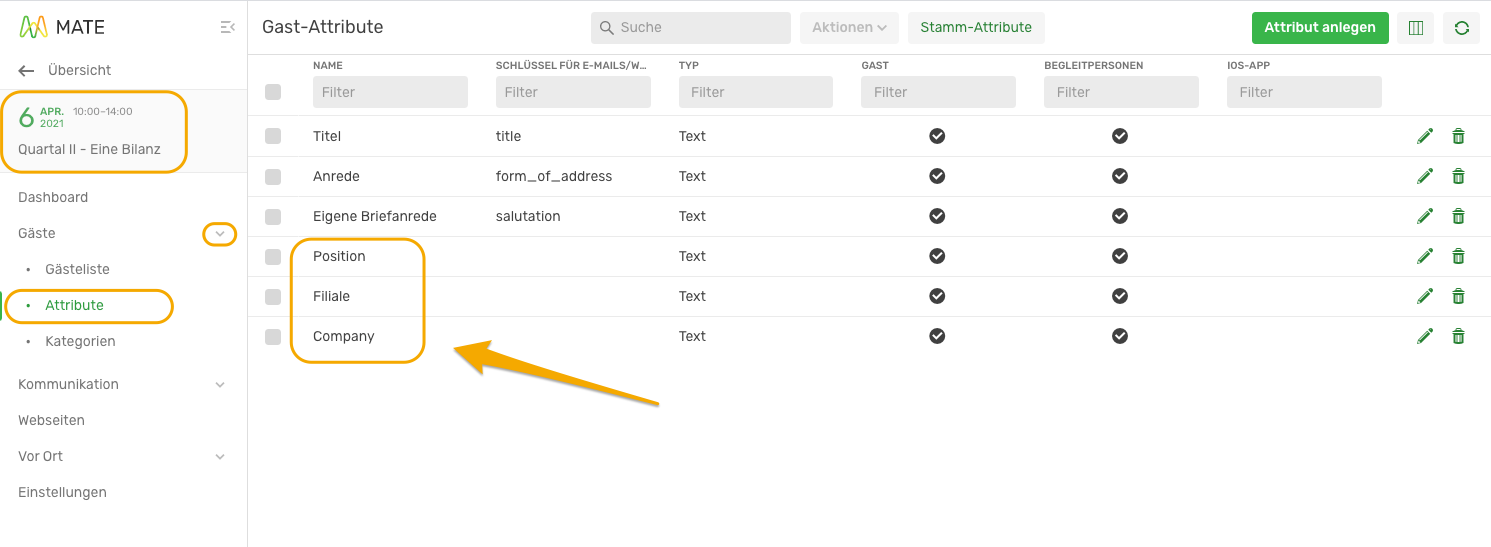
If a new event is created, the cross-account guest attributes are automatically applied to this event in addition to the master attributes. You can easily check this in the menu area Guests ---> Attributes.
Edit attributes
You can edit attributes using the following functions:
- Actions (use the pencil icon to edit attributes; use the trash can to delete the attribute).
- Sorting (You can sort your attributes simply by holding down the mouse button and dragging the attribute to the desired position. It is important that you do not click on the attribute, but only hold your mouse pointer over it).
The individual editing of an attribute
If you want to edit or adjust a certain attribute individually, simply click on the corresponding attribute in the overview. A mask opens with all information about the selected attribute, which you can now adjust manually. Please remember to always save your changes before you close the mask again.
Set limit for attribute values
You have the option of setting a limit for the values. The limit can be the same for all values or set individually for each value. If, for example, you have a maximum of 50 per selection for all menus offered in a menu selection, store 50 as the general limit. If, however, you only have 30 menus available from the vegan dish, you can individually store the limit of 30 in this value.
For both variants, once the maximum number is reached, the value is deactivated (greyed out) and the guest can no longer select this "value" in the query in the registration form.
Adding the general limit
As soon as you have inserted a value in the attribute, the column "Limit for all given values" opens. Here you can now enter the number directly or determine a number by "-" or "+".
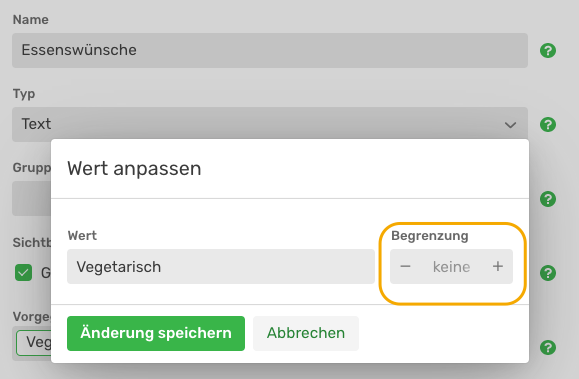
Adding an individual limit for one or more values
Select the value by double-clicking. A new pop-up window opens. Enter the number directly here, or specify a number using "-" or "+". Save and repeat with the other values if necessary.
If nothing is entered, the general limitation (if any) applies.
Group Attributes
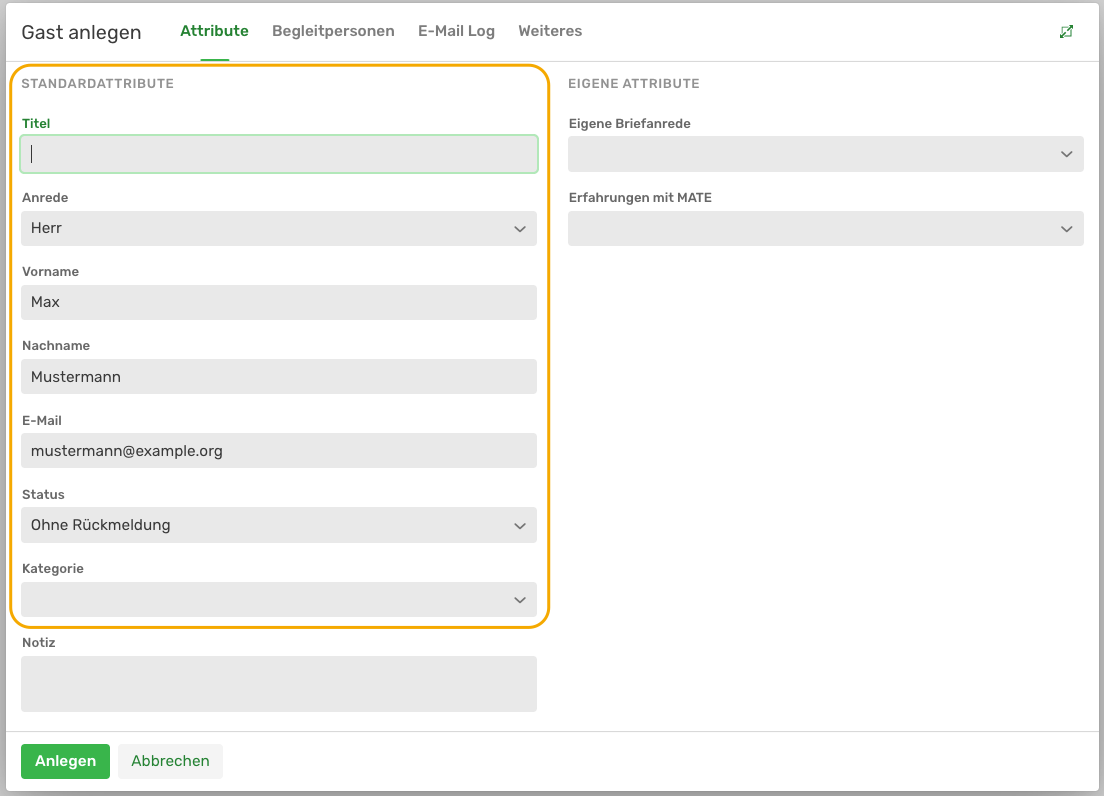
Attributes can optionally be assigned to a group, for example "Address". This function serves to increase clarity: Attributes of a group are automatically grouped in the guest edit dialog. Attributes without group names are displayed first.
To create a new group, click in the Group field, enter the desired group name and press the Enter key. Alternatively, you can select an existing group from the drop-down list.
Show and hide attributes
With the help of this function, you can show and hide the attributes for the individual guest view.
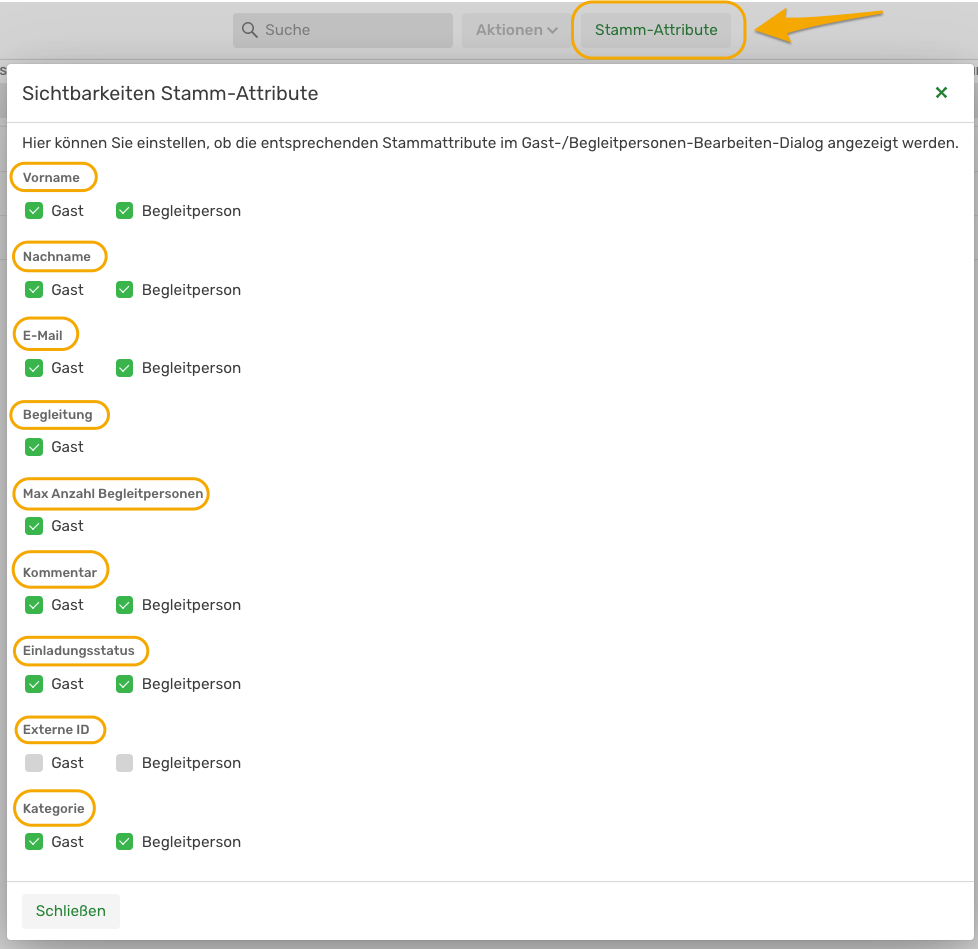
Procedure for master attributes
In the Attributes menu area, click on the "Master Attributes" button. A new window opens in which all master attributes are displayed. Here you can decide whether the respective attribute should be displayed for the guest and/or the accompanying person.
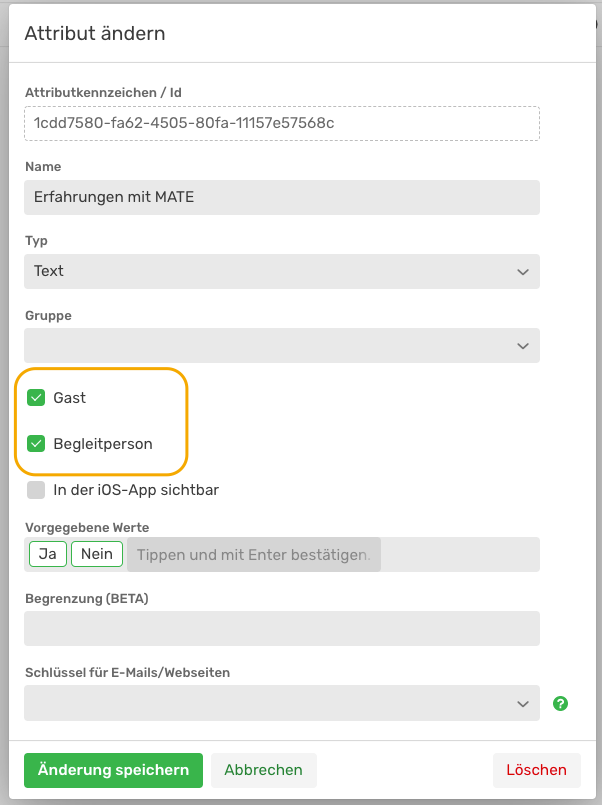
Procedure for additional attributes
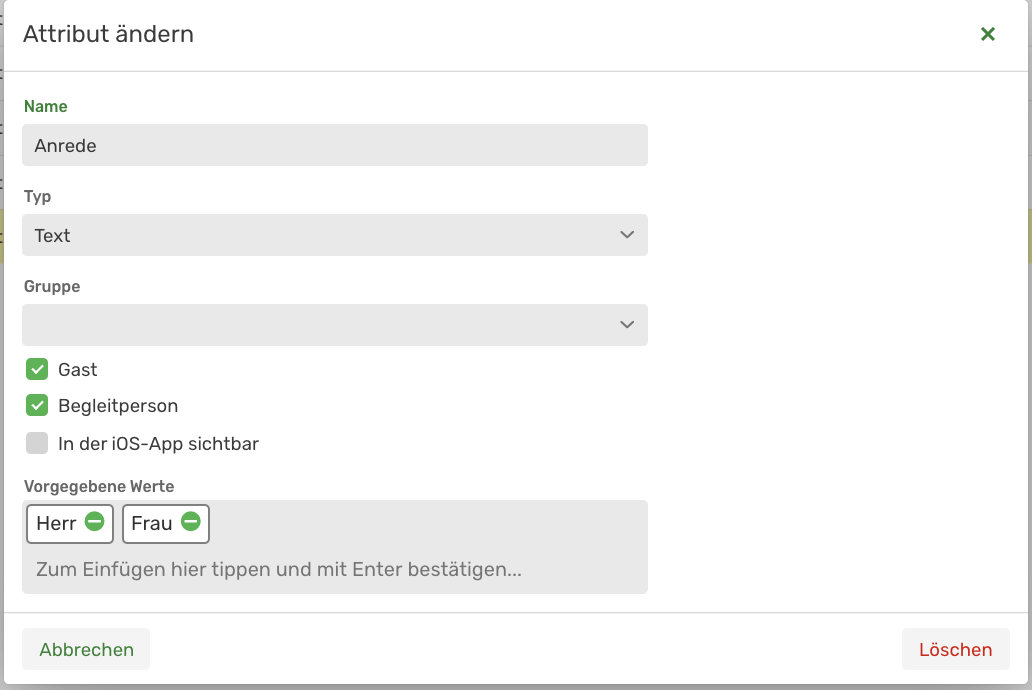
Here you will find the tick marks for showing and hiding in the "Change Attribute" window. The window opens when you click on the attribute or want to edit it via the pencil symbol.
Deleting attributes

You can select several attributes in a bundle and delete them simultaneously using the action field:
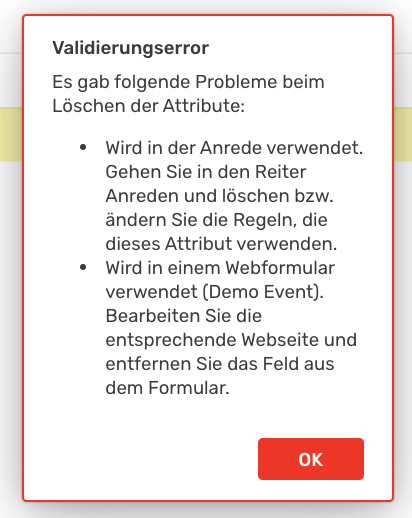
Deleting these attributes, such as the salutation attribute in this example, is only possible again once you have ensured that it is not used in any of the locations just mentioned (for example, within the registration form on the website). The system displays the following in.
Working with attributes and attribute values when importing guest data from an Excel file
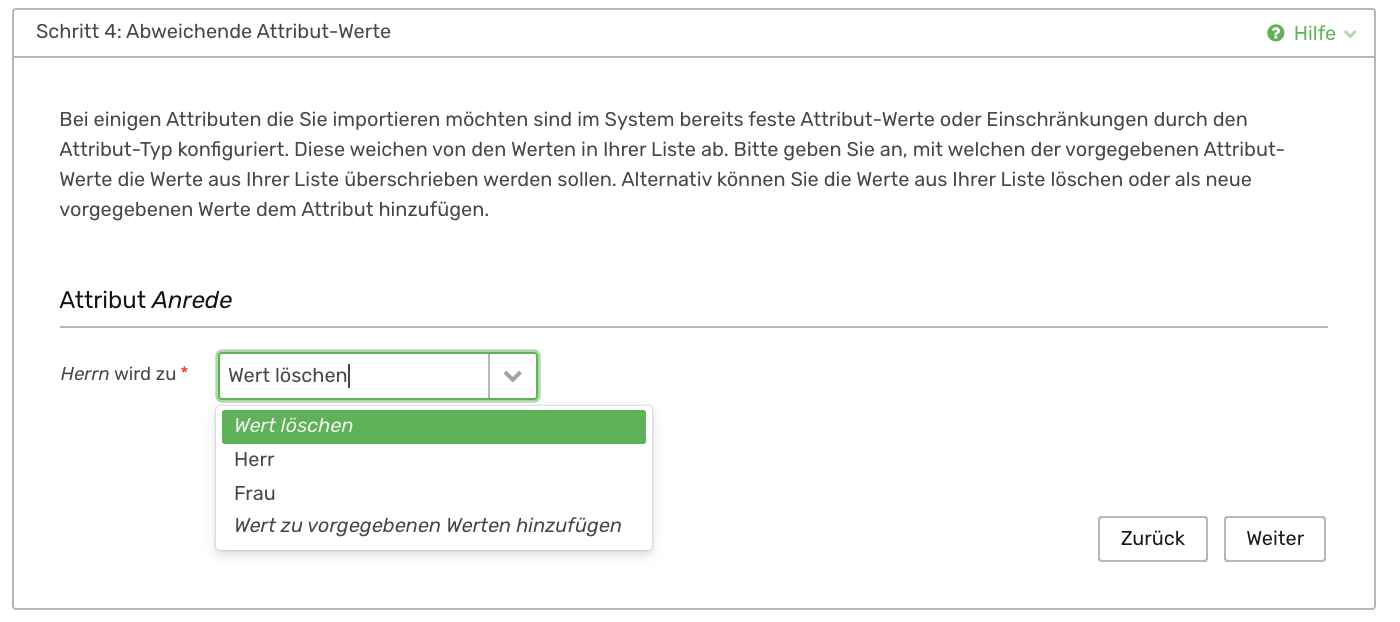
Sweap offers you simplified handling and display of deviating predefined attribute values when importing guest information. If your event contains predefined attribute values that differ from the imported lists and the values available there, the system recognizes this difference during the import.
This is particularly relevant for alternative value notations.
Let us take a look at the example: You have saved "Mr" and "Ms" as default values for the attribute "Salutation". However, the Excel table to be imported does not contain the value "Mr.", but "Mr.". The system automatically recognizes this difference when you import the Excel list and displays the differences to the predefined standard attribute values so that you can replace them directly with the correct value "Mr." during the import. Alternatively, if required, you can assign and create a new attribute value to the attribute directly during the import: