Table of Contents
Sweap Guestlist App
 Updated
by Julia Walther
Updated
by Julia Walther
With the Sweap App you can quickly accredit your guests directly at the event.
Please note that these functions as well as the name badge printing are only available in a paid version.
They are not included in the free licence.
The installation
The app is only available on iOS devices. If necessary, you can rent the necessary devices for your events via Sweap. The Sweap app is pre-installed and up-to-date on the rental devices.
Alternatively, you can install the app on your own iOS devices for free. You can find the Sweap Guest List App in the Apple App Store or via the download link you received from us. If you have any problems please contact the Sweap support at support@sweap.io.
The Log-In
The app requires a working internet connection for log-in. After that you can also work in offline mode. With the exception of synchronization, all functions are also available offline.
Event Search
After logging in, all your existing events are loaded. Using the search function, you can filter your events by keyword or search specifically for an event. If you do not use the search function, all events are displayed in chronological order. "Expired" events are displayed in grey.
Once you have selected an event, an overview opens containing the most important information about your event. The view and display of individual attributes in the app can be set via the CMS page.
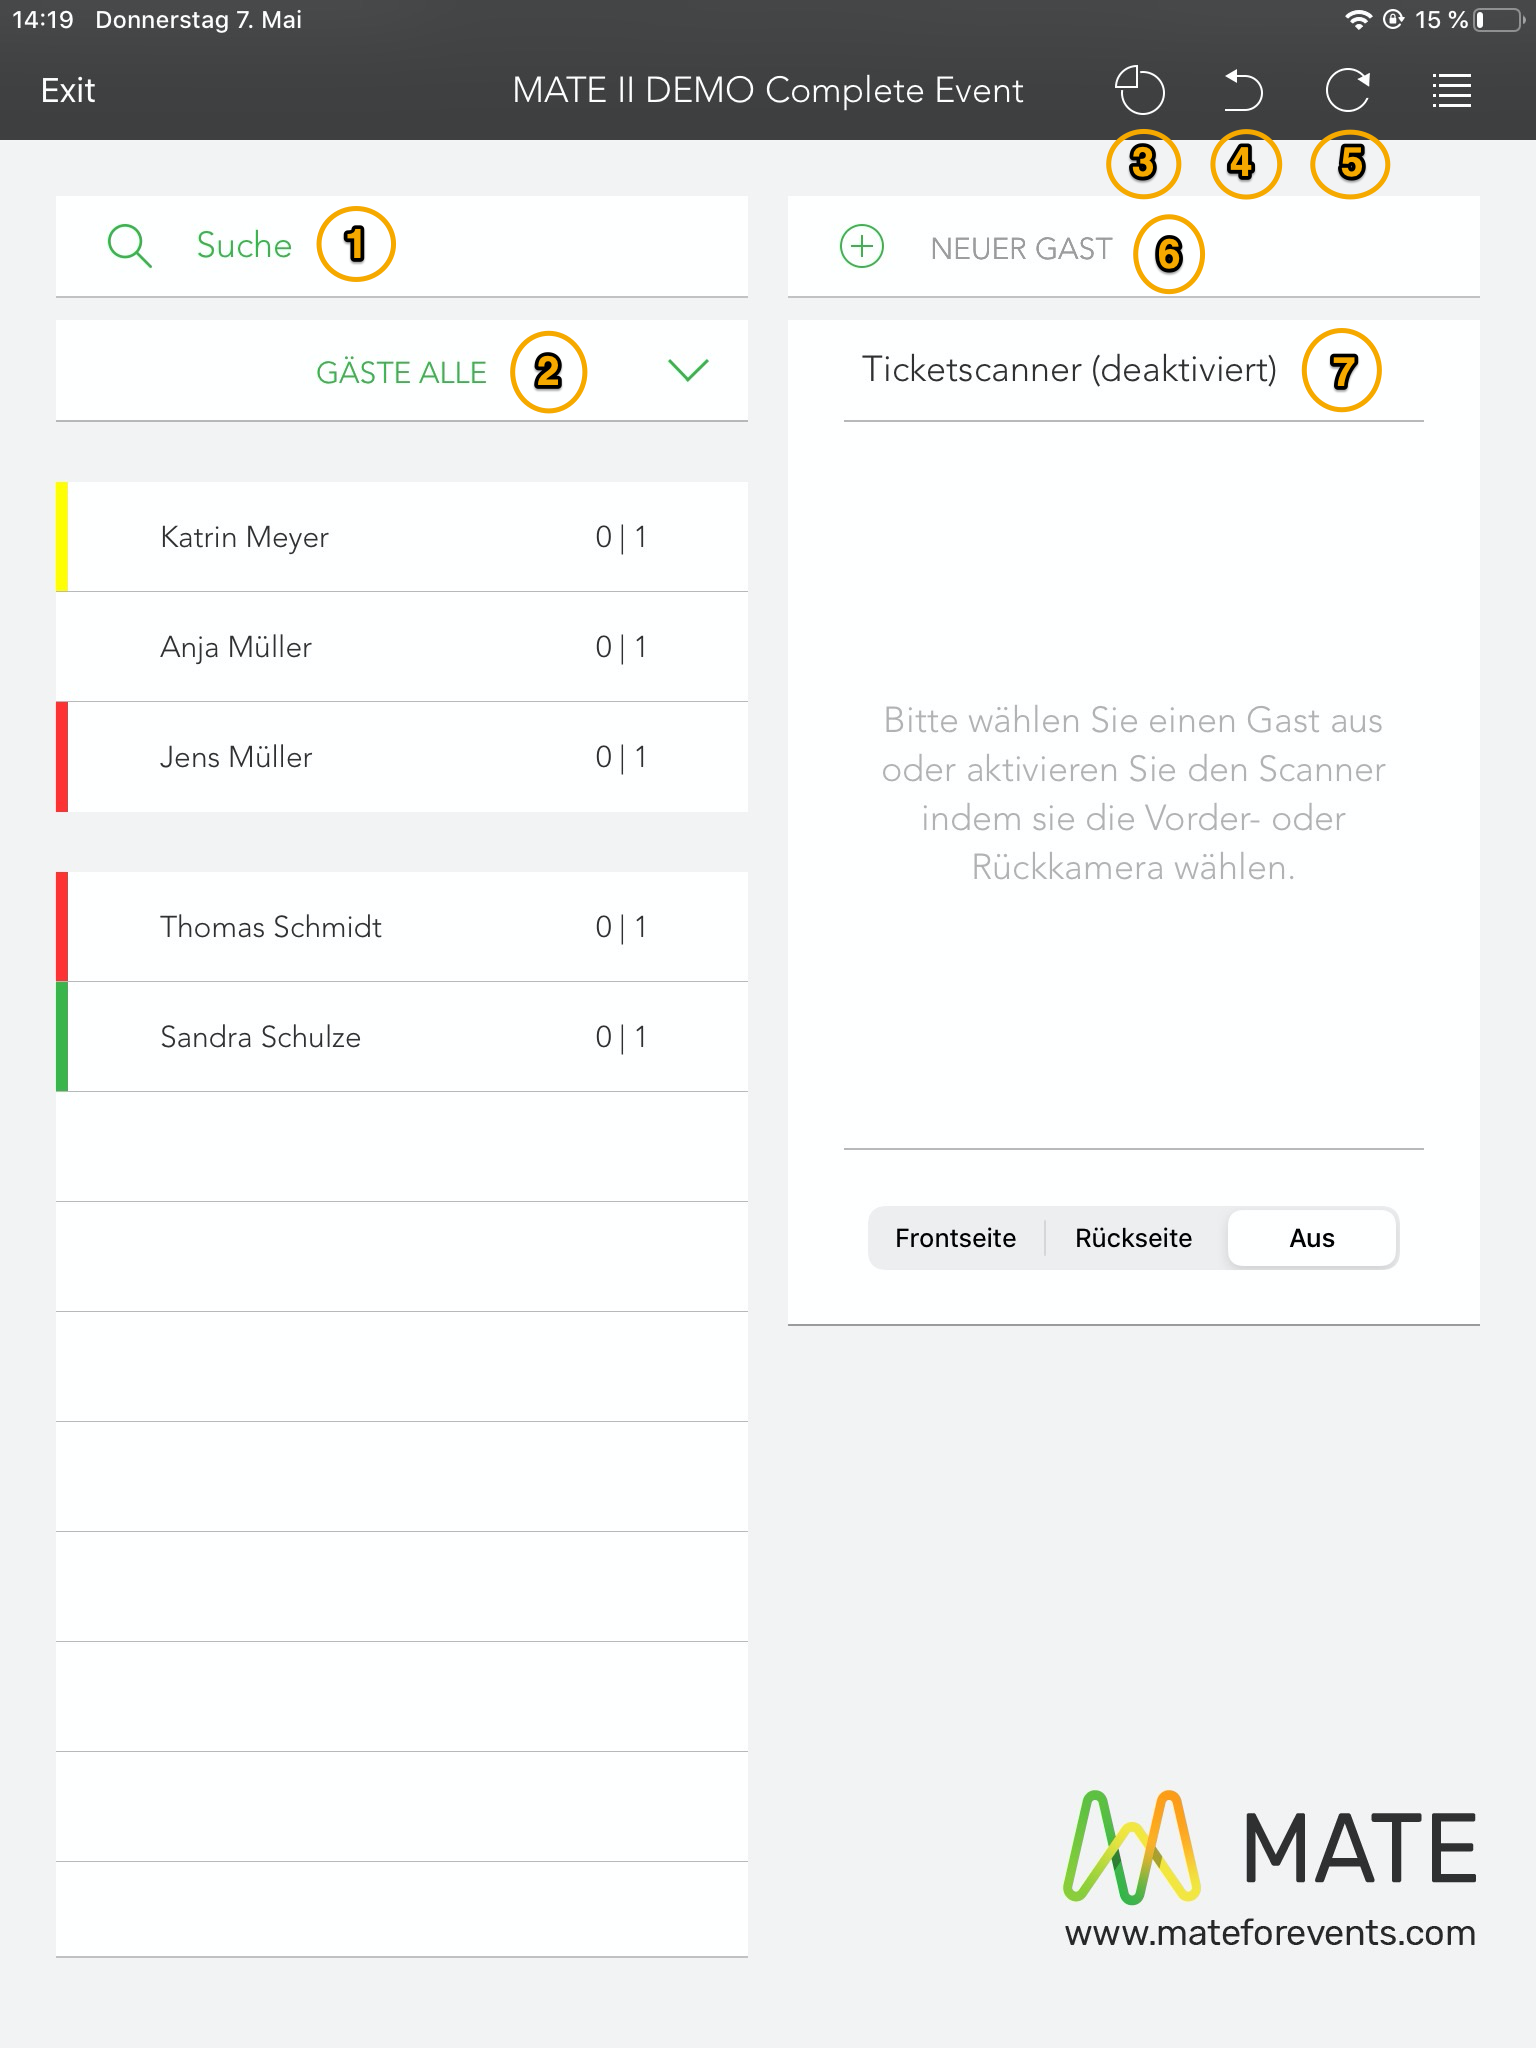
The search field (1)
The search field can be used to filter a specific guest (first and/or last name), company or keywords.
The list of all guests (2)
The list of all guests, which can be used to filter by category if you have divided your guests into categories. The color differentiation of these categories is displayed as in the CMS overview in the app.
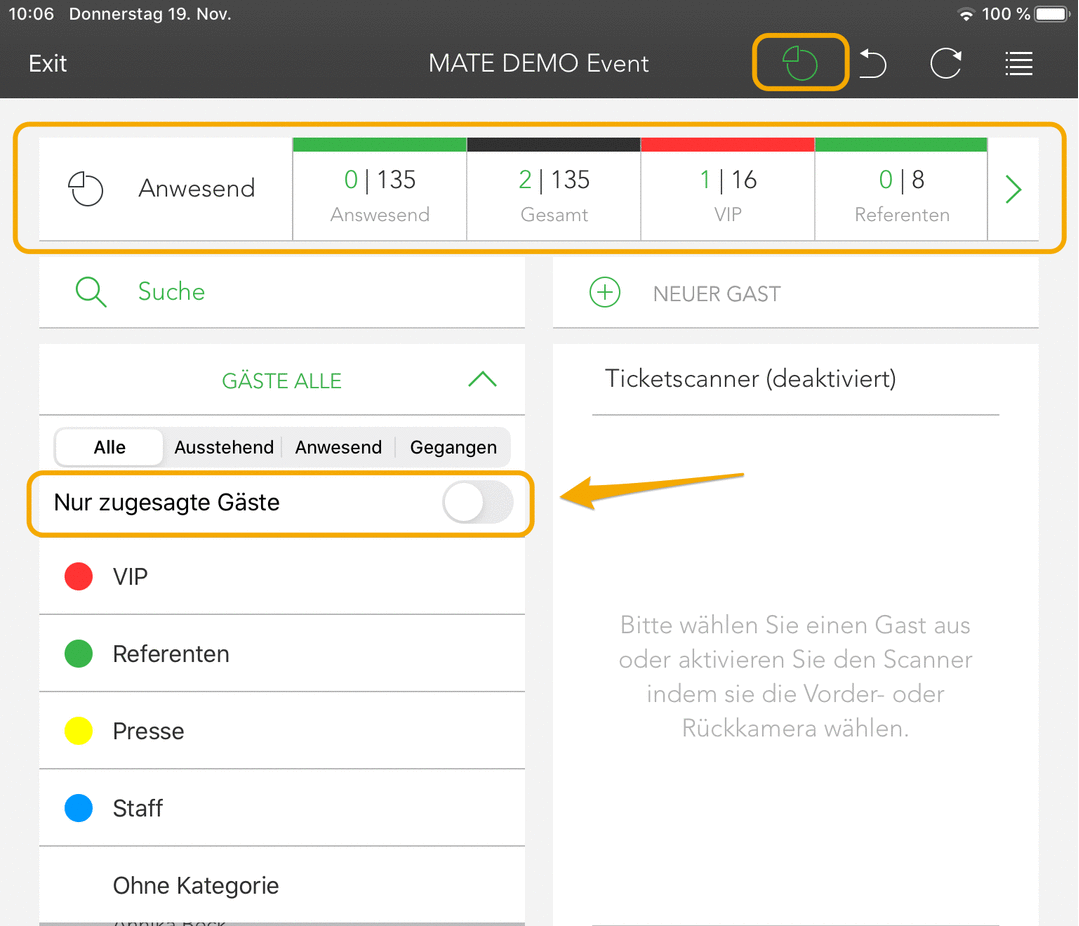
The following filter functions are available:
All / Pending / Present / Outgoing (if checked out)
In the app overview, the navigation bar is displayed at the top of the screen.

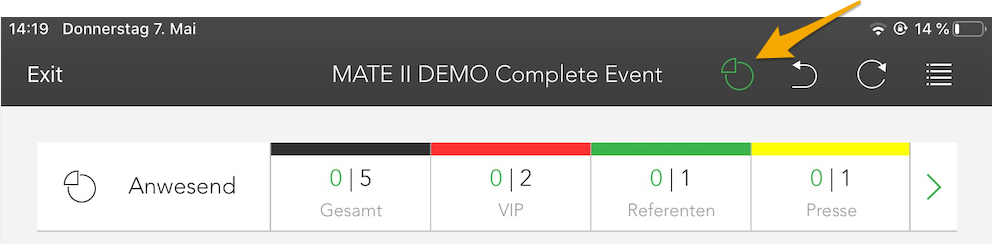
The live evaluation (3)
This allows you to display or hide a live evaluation of your event. You can view all present and absent guests here.
The Undo button (4)
The navigation bar contains an 'Undo' button. For example, you can undo an incorrect check-in.

The Refresh button (5)
With the help of the Refresh button you can update the data of your event.

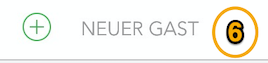
Create a new guest (6)
If you want to add a new guest during an event.
The ticket scanner (7)
For check-in, you can use the ticket scanner to scan the QR code or alternatively, you can manually check in a guest without a scanner.
You will find the QR ticket scanner on the right side of the screen in your event overview.
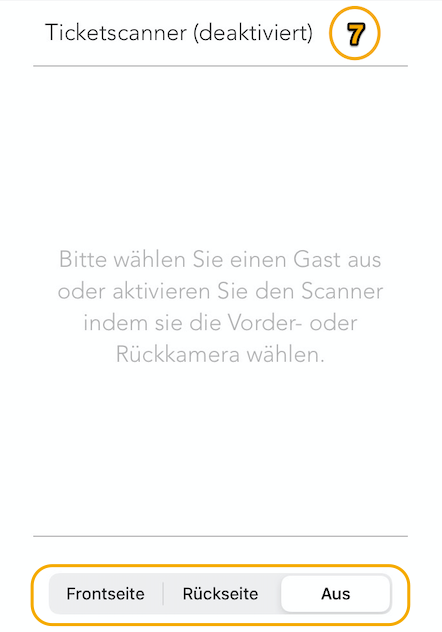
In our example, the QR Code scanner is disabled. By clicking on the 'Front' or 'Back' buttons, you can activate either the front or the back camera and thus scan the guest ticket and check in the guest.
Alternatively, a manual check-in can be performed. This works via the guest information of each guest in the app.
Editing the guest categories
Use the list icon (next to the refresh button) to edit and add categories. An overview of all already created categories opens, which you can now edit. You also have the option to create new categories using the 'Plus' symbol.
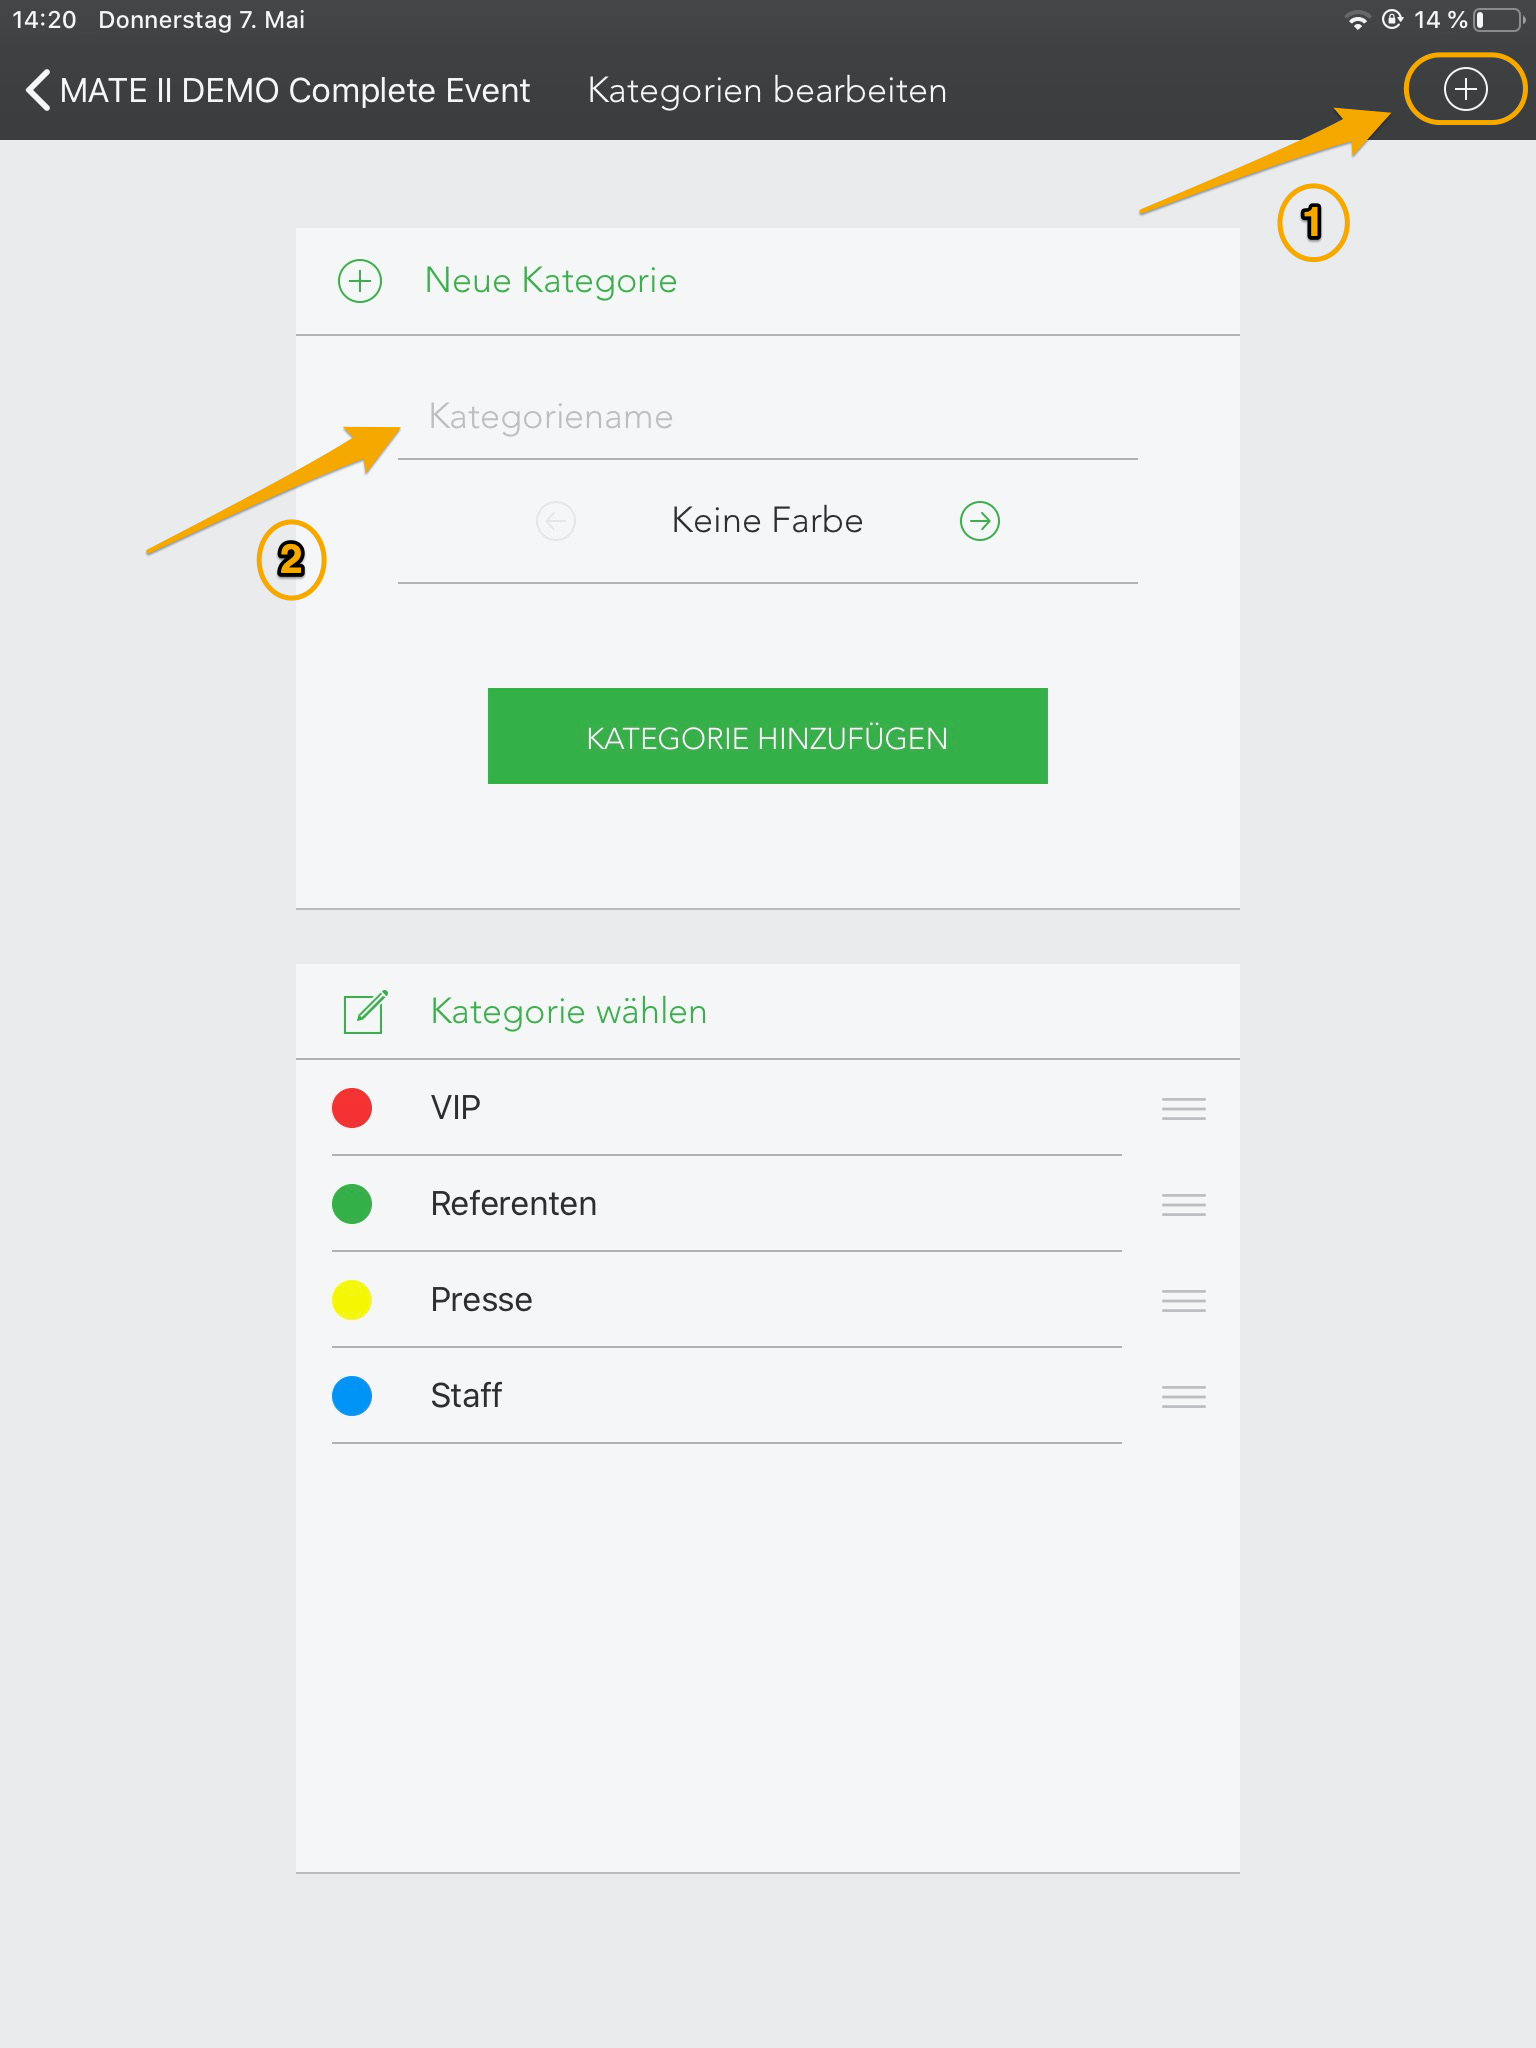
When creating a new category, a unique name should be assigned and a color for visual differentiation. With 'Add category', this category is created for the selected event and displayed with the selected color in the overview of the app.
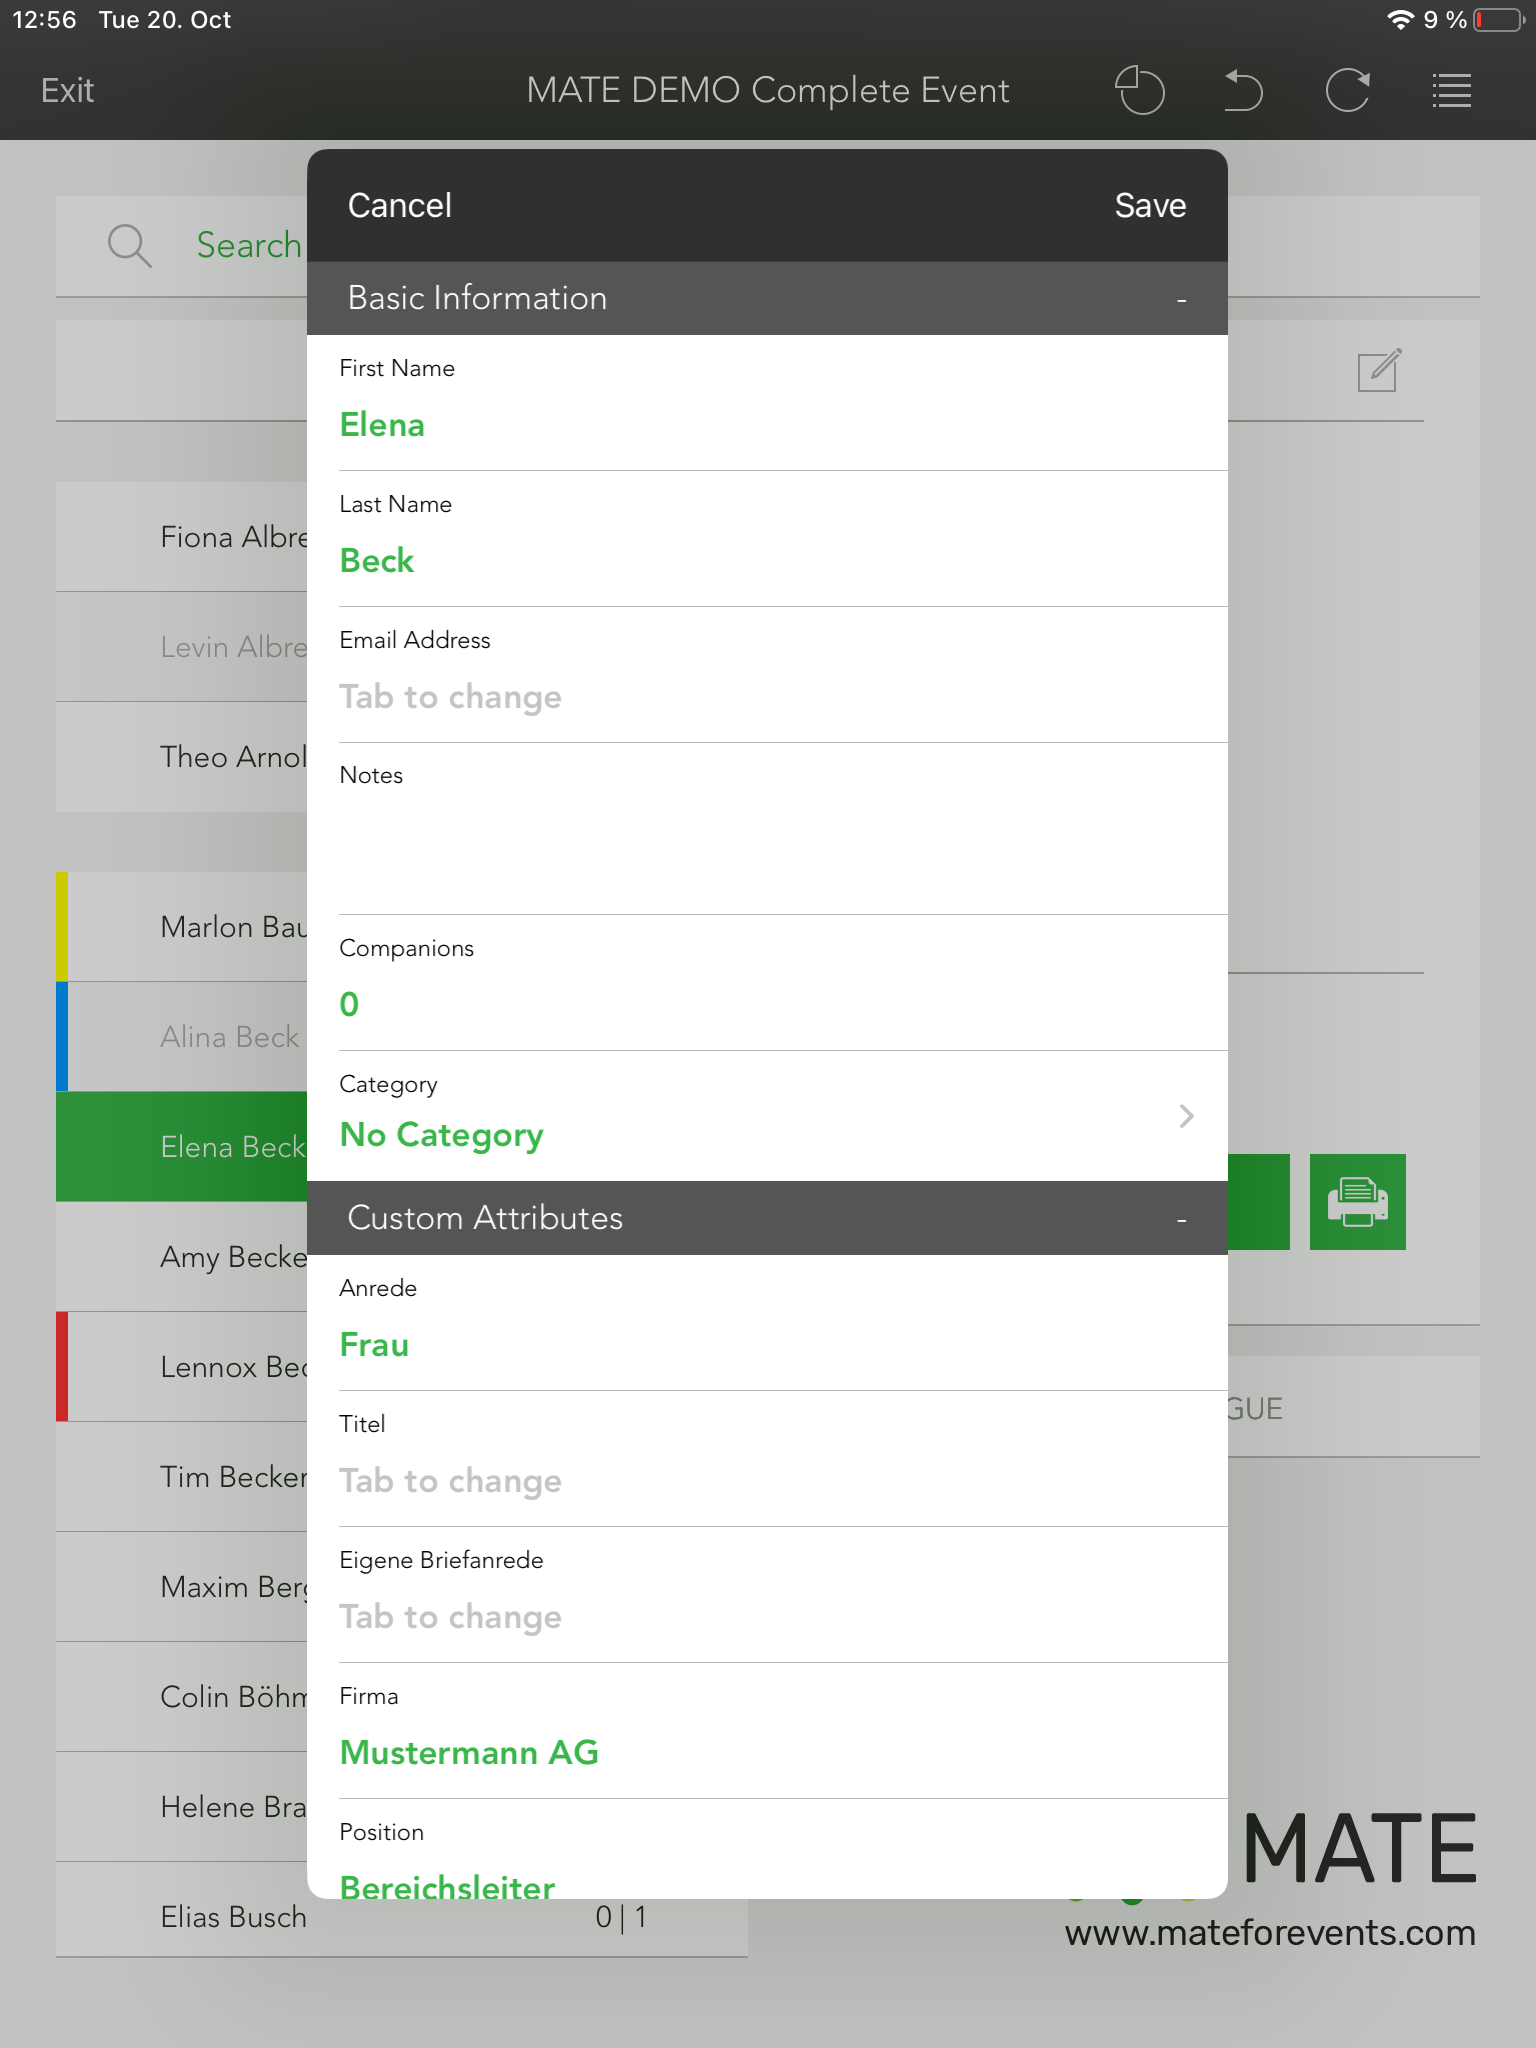
The guest information
By selecting a guest, you will see on the right side of the app, their most important information.
Here you can see, for example, the guest's status and whether the guest has already checked in and checked out. You can also use this app to manually check in and manually check out and change existing guest information.
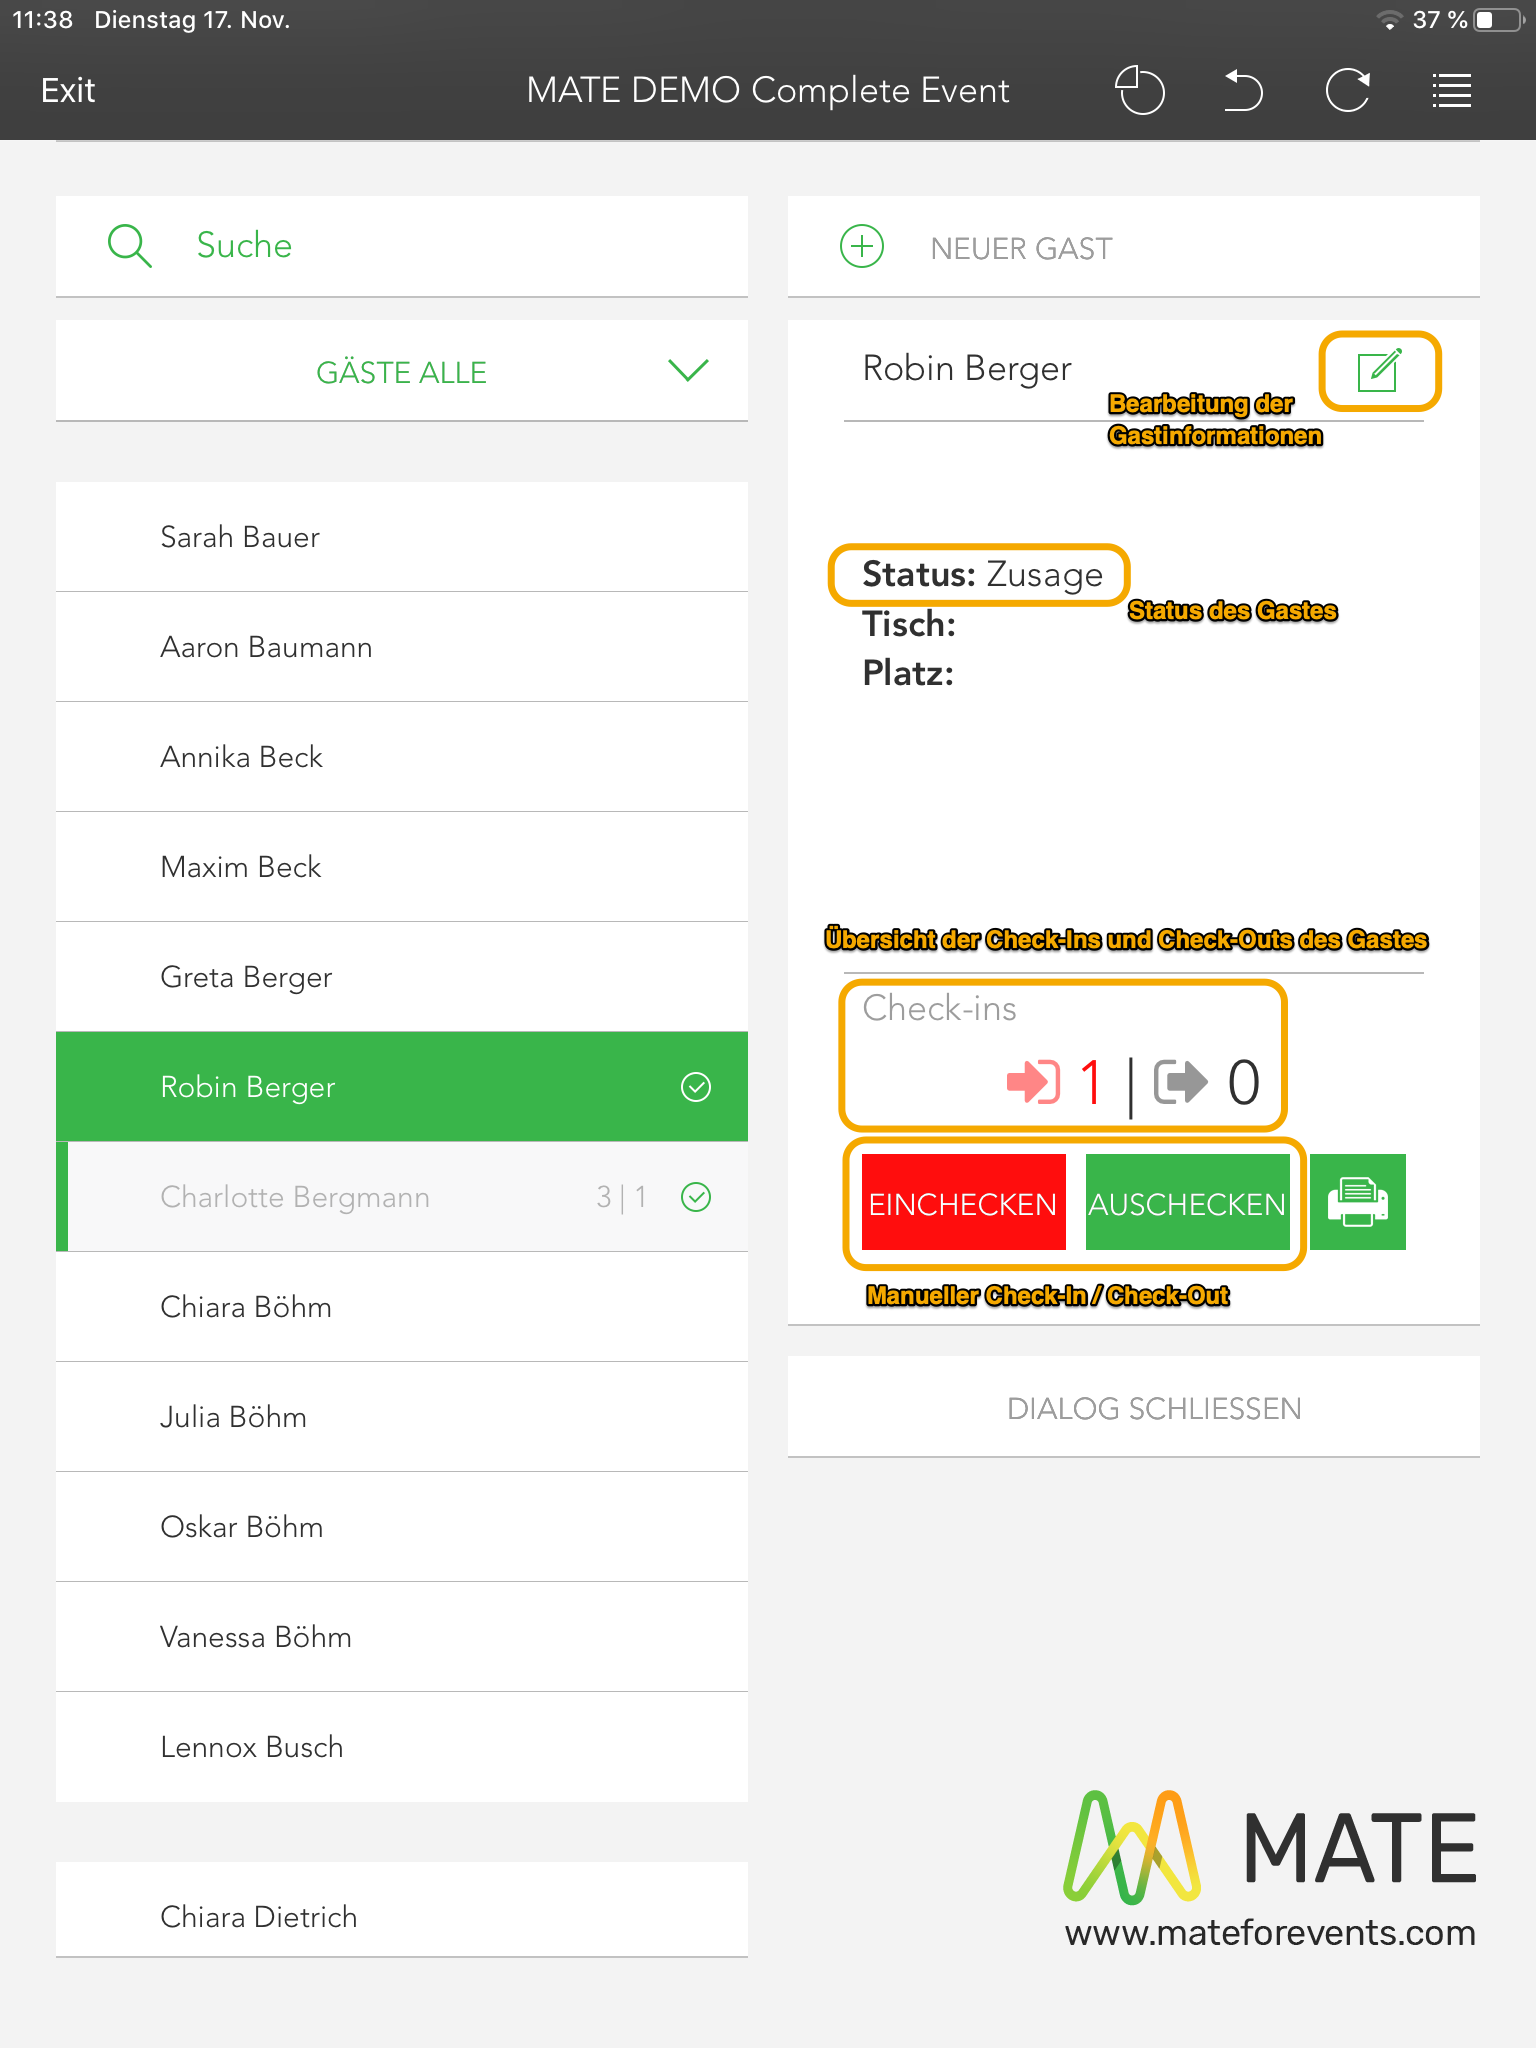
The button 'Close Dialog' will take you back to the overview of your event.
Edit guest information
With the help of the guest dialog you can edit your guests at any time during the event. To do this, click on the Edit icon in the guest information. This can be found to the right of the guest name.

The guest dialog will open and you can edit each attribute and category. Click on Save to save the data. This data is immediately transferred to the backend when it is available online.